


Wood, Faux-Wood & Aluminum Venetian Blinds
Measuring for your blinds is easier than you may think! All you have to do is follow our simple tips, double-check everything you do, and set aside some time to do it.
This guide works for:
- Wooden blinds
- Faux Wooden blinds
- 25mm Venetian blinds
- Perfect Fit
Standard Windows
Recess Fitting
Measure the full width and height of the recess and we will make the exact deductions to ensure a perfect fit.
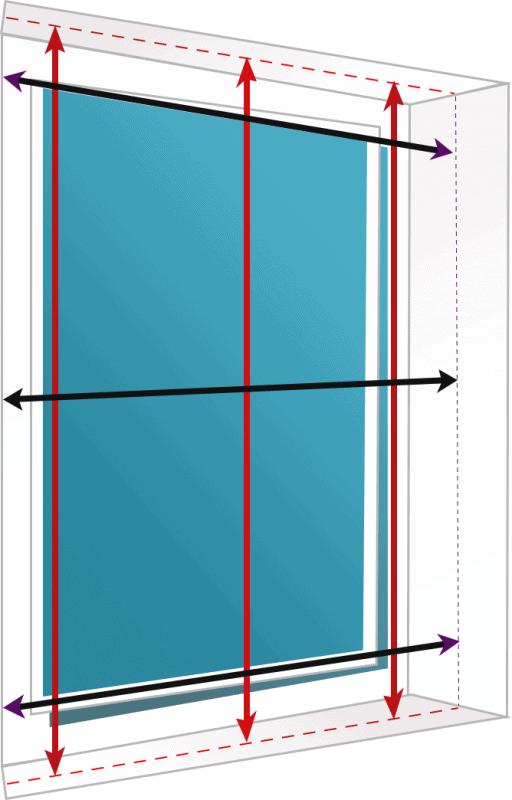
- Measure in 3 places for both the width and the drop, use the smallest measurement.
- Don’t make any deductions, we will deduct 10mm from the width to ensure your blind fits.
- Use a metal tape measure, cloth ones can stretch and give you inaccurate measurements.
Top-Tip:
Check that your recess is deep enough to fit the blind into, also bearing in mind any obstructions such as handles (see table).
Wooden & Faux Wooden
| Slat Size | Depth |
|---|---|
| 25mm | 30mm |
| 35-38mm | 65mm |
| 50mm | 70mm |
| 63-65mm | 80mm |
Aluminium Venetian
| Slat Size | Depth |
|---|---|
| 25mm | 30mm |
| 50mm | 65mm |
| Synergy | 70mm |
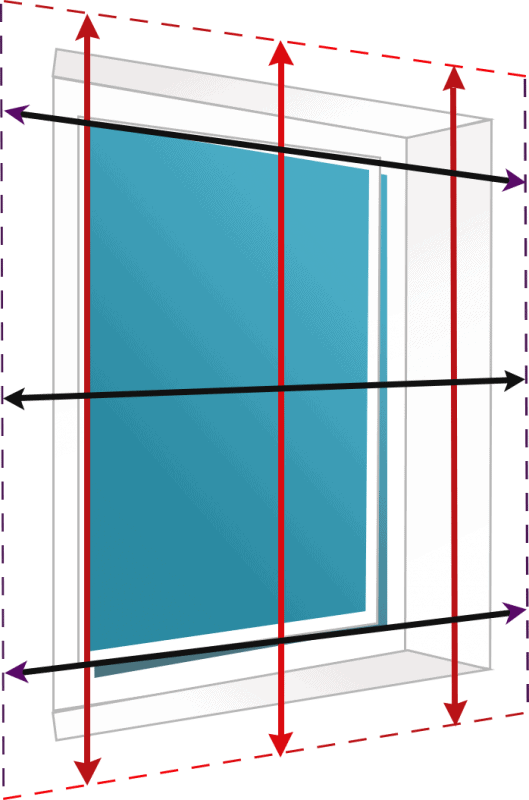
Exact fitting
Measure the full width and height of the recess and add a little extra to the top and to each side, and we’ll make the blind to the size you specify with no deductions.
Other Windows
Part-tiled recesses
If you have tiles part-way up your recess (often the case in kitchens and bathrooms) then the space between them is most likely to be the narrowest point in the recess.
Measure between the tiles to ensure your blind will fit. You will need to top-fix or face-fix your brackets in this case.
Bay windows, half-bays & L-shaped windows
We have some handy guides already put together especially for wooden blinds in bay windows, click on the links below to take a look!
Angled bay windows
You can use these same guides for angled half-bay windows, it’s the same principle.
Square bay windows
You can use these same guides for L-shaped windows, it’s the same principle
Unique Features
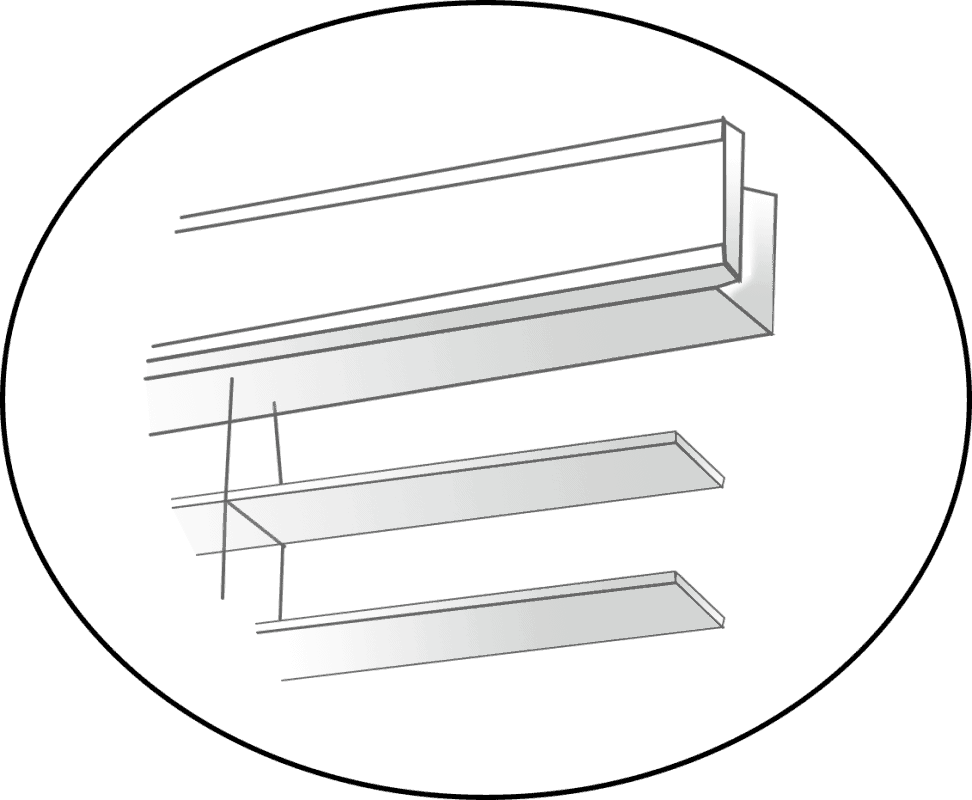
Our 35/50/63mm Venetian Blinds come with a decorative Pelmet / Valance which covers the headrail.
- Real wood
- Faux wood
All pelmet / Valance will come oversized so that you can easily cut the to the correct size on site. This will give you a better finish.
Pelmets for Recess Fitting
Pelmet for Bay Window
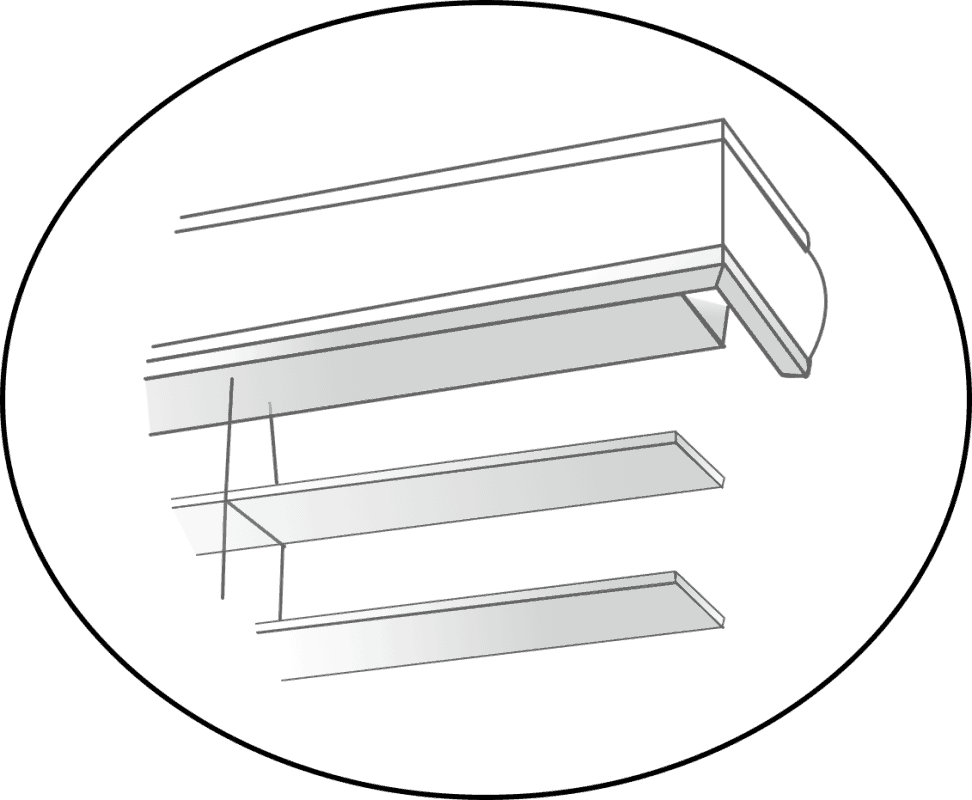
Please advise on order that blinds are for bay window so that end returns can be provided.
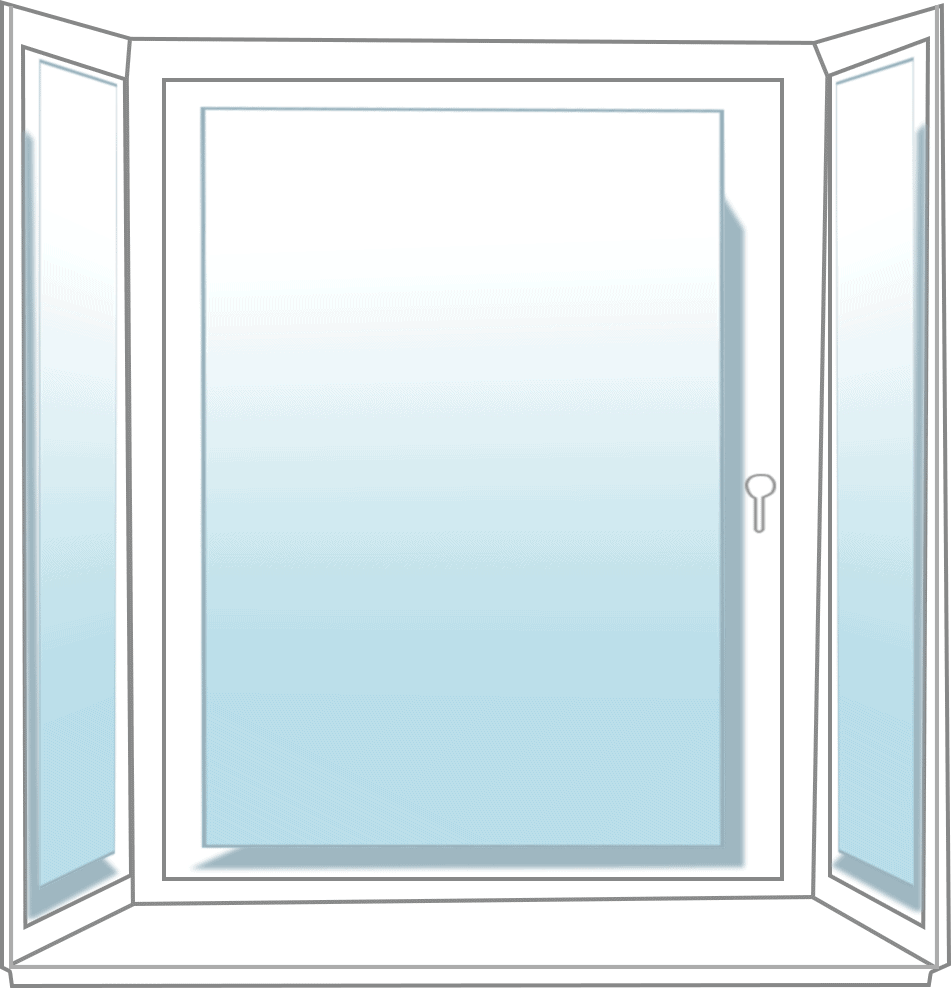
Measuring for Perfect Fit Blinds
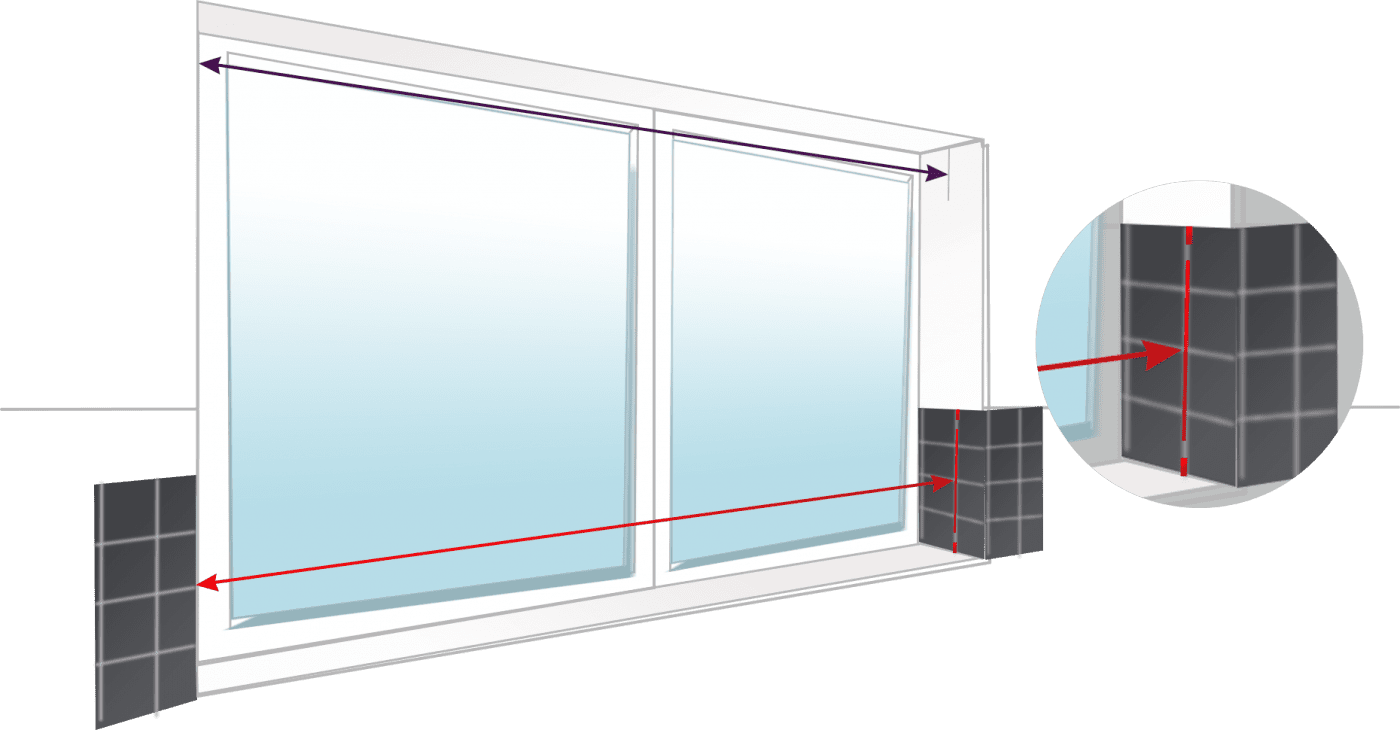
Simply measure the visible glass area of each window or door. Remember to use a metal tape measure, as cloth or plastic ones can stretch and give an inaccurate measurement.
Only measure up to the edge of the rubber bead, don’t include it in your measurement.
Top-Tip:
Don’t forget to measure each window or door individually; don’t assume that they’re all the same size.
Measure from the inside edges of the frame where the glass meets the rubber bead. You shouldn’t include any of the beading or rubber seals in your measurements.
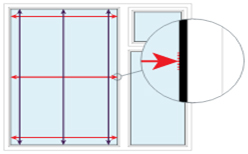
Measure the top, the middle and the bottom of the glass to the nearest mm and note down the shortest measurement.
Make sure that you measure every window as it may look like they are the same size but they can differ by a few mm.
- Then simply repeat this step for the drop, measuring the left, the right and the center. Again, take a note of the shortest measurement.
- Next, measure the depth of the window from glass to beading. To do this, simply place a credit card over the corner of the frame and use a metal ruler to take the measurement. This clips available are 18,20,22,24,26,,30,32,38mm — always select the nearest large size.
Top-Tips:
First, check the distance between the edge of the window beading and any obstructions, such as window handles. This should be more than 6mm. Don’t worry if it isn’t, there are ways around it so give us a call to place the order and we’ll go through it with you.
Check also that the rubber beading does not extend into the glass area by more than 6mm. Again, if it does, give us a call and we’ll run through your options.
Angled-Bay Measuring Guide
Wooden Blinds
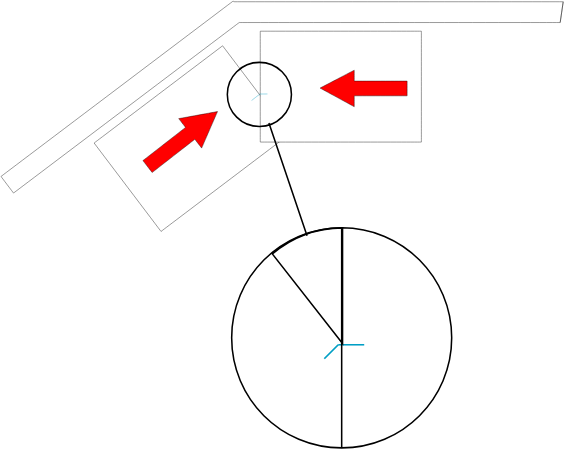
Step1
Before you begin to use this guide, please select the correct head rail depth from the table above. If you have window handles or vents that stick out from the window frame, measure how far these protrude and add this to the head rail depth. This will be used as measurement (A).
You will need:
- 2 no. Pieces of A4 or A5 sized paper or card
- Pencil
- Metal Tape-measure
- Ruler
Wooden Blinds
| Blind Type | Rail Depth |
|---|---|
| 25mm Slat Wooden Blind | 55mm |
| 35mm Slate Wooden Blind | 65mm |
| 50mm Slate Wooden Blind | 70mm |
| 63mm Slate Wooden Blind | 80mm |
Step2
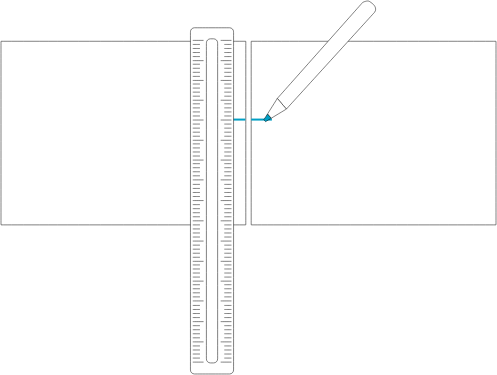
Using two pieces of paper, place them edge to edge and mark both of them at the required measurement (A).
Step3
Slide the two pieces of paper towards each other along the window sill of the bay until the two marks that you made meet up.
Step4
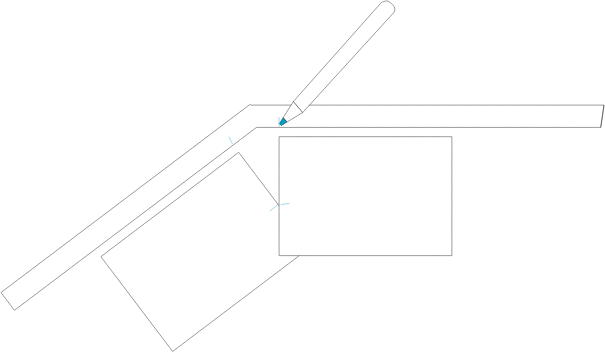
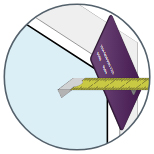
Using a pencil, make a mark on the window sill at the point where the paper meets the window frame.
Step5
Measure from one mark to the next as detailed in the diagram. This will establish the width of the blind that you will need to order.
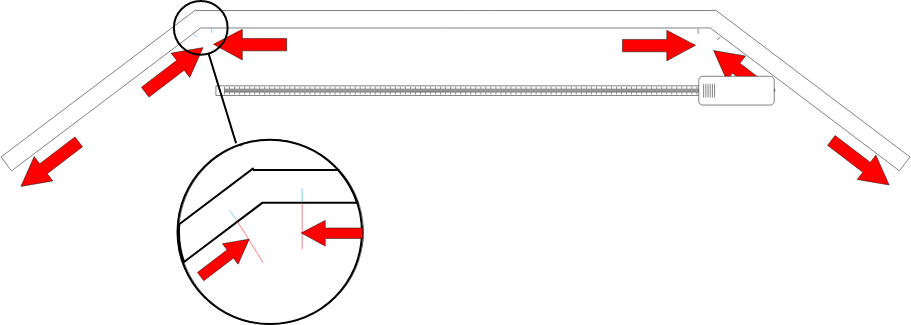
Step6
Measure the drop from where the top of the blind will sit down to where you want the blind to end (typically the window sill). All of the blinds should then be ordered as ‘Exact Fitting’.
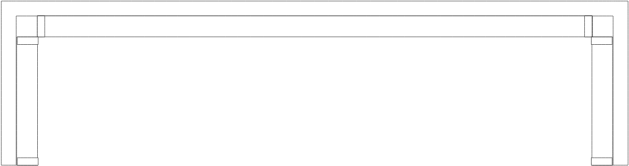
Box-Bay Measuring Guide
Width
Use the table at the top of the guide to find the rail depth for the size of wooden blind you are going to be measuring for. Select which of the three options will suit your bay and then use a metal tape-measure to ensure your measurements are accurate.
Wooden Blinds
| Blind Type | Rail Depth |
|---|---|
| 25mm Slat Wooden Blind | 55mm |
| 35mm Slate Wooden Blind | 65mm |
| 50mm Slate Wooden Blind | 70mm |
| 63mm/64mm Slate Wooden Blind | 80mm |
Option1
This is the most common method of installation in a box-bay window. The blind runs across the front almost corner to corner and then the side blinds are installed butted up to the front blind. To measure for the front blind all you do is measure the full width of the bay from side to side and order this blind as ‘recessed fitting’. Measure the sides in the same way (do measure both sides separately as often they are slightly different) so that you measure into the corner again but then deduct the rail depth from the width. This allows for the use of the head rail on the front blind. The side blinds should then be ordered as ‘exact fitting’.

Handles, openers and vents
If you have any obstructions protruding from the front window, simply measure how far they stick out past the window frame and deduct this from the width of the side blinds.
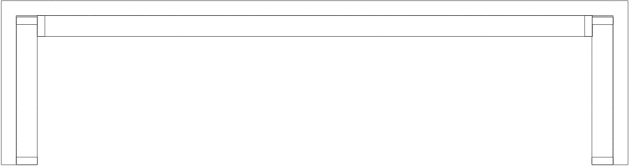
Option2
For a very professional finish, this is really the only option to follow. However it does not work for every box-bay window. Be sure to check the size of the window frame in the corners first, going from the corner of the bay to the start of the glass pane on both the font and the sides. If either measure less than the rail depth follow option 1 or 3 instead so that you do not end up with blinds that do not quite cover the glass area.
The basic method of option 2 is to have all three blinds meet in the corners of the bay but without overlapping. This is done by leaving a square void in the corners. Measuring is straight forward, just measure all three sections directly into the corners. You will then deduct the rail depth from the measurement for each of the side blinds and deduct double the rail depth from the measurement for the front blind. All three would then be ordered as ‘exact fitting’ blinds.
Handles, openers and vents
Obstructions on the front window will reduce the width of the side blinds, Obstructions on the side windows will reduce the width of the front blind. Measure how far these protrude past the window frame and reduce the width of the blind it affects by that amount.
Option3
This method is less common than options 1 and 2 but it does have it’s uses! Some box- bay windows have side windows that are so small that by time you have deducted the rail depth from the side measurements, the measurement you end up with is smaller than the minimum width we can make a wooden blind. In option 3, the side blinds continue into the corners and the front bind sits between them.
Measure the sides into the corner and use this measurement to order both as ‘recessed fitting’. The front should be measured corner to corner again but then deduct double the rail dept from the width to allow for the head rails of the two side blinds.
Handles, openers and vents
Only obstructions on the sides would have an affect on the measurements. Measure how far the obstruction protrudes past the window frame and reduce the width of the front blind by that amount. Bear in mind that there’s an obstruction on both sides, the width of the front blind would be reduced twice to account for these.
IMPORTANT!
Always check the widths in three places as you would for a regular recessed windows. Bay windows are prone to movement and you may find that the widths vary even if at first glance the windows look even. It is always the smallest of three measurements that you should be working with.
Drop
This is the same for all three options. It will simply be from the point where the blind is being mounted down to the window sill. Remember that the head rail is included in the drop and that you will need a flat space of at least 50mm (5cm) to mount the brackets securely.