


Installation Guide
Aluminium Venetian Blinds
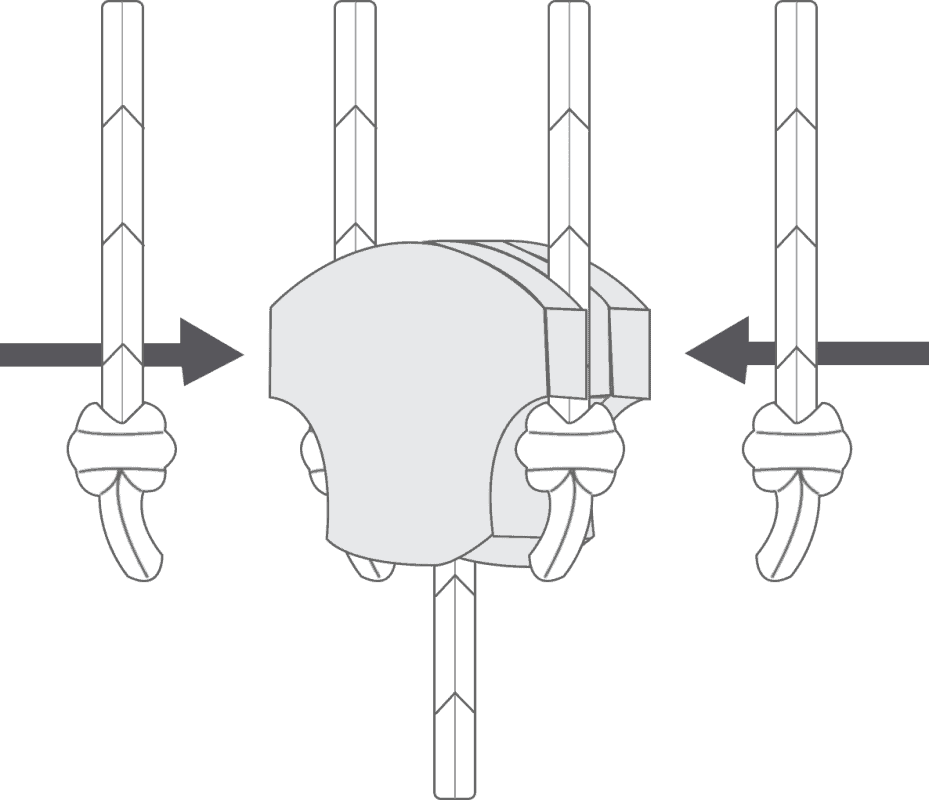
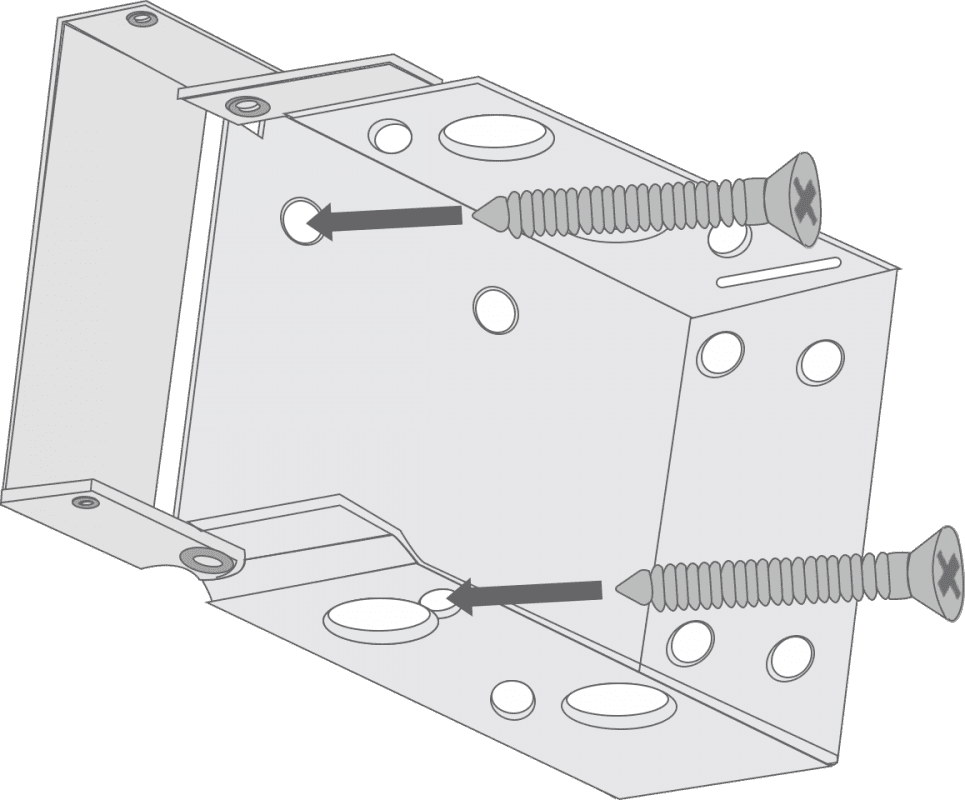
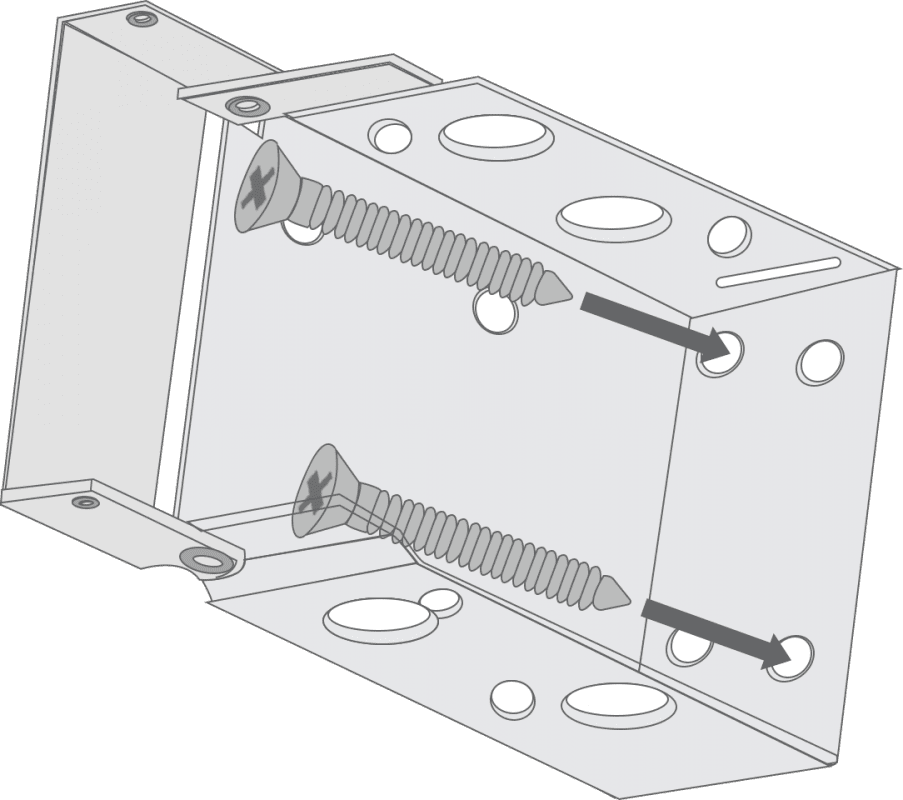
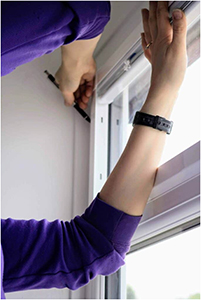
Fitting the brackets Step 1
The brackets offer two methods of installation:
Top-Fixing
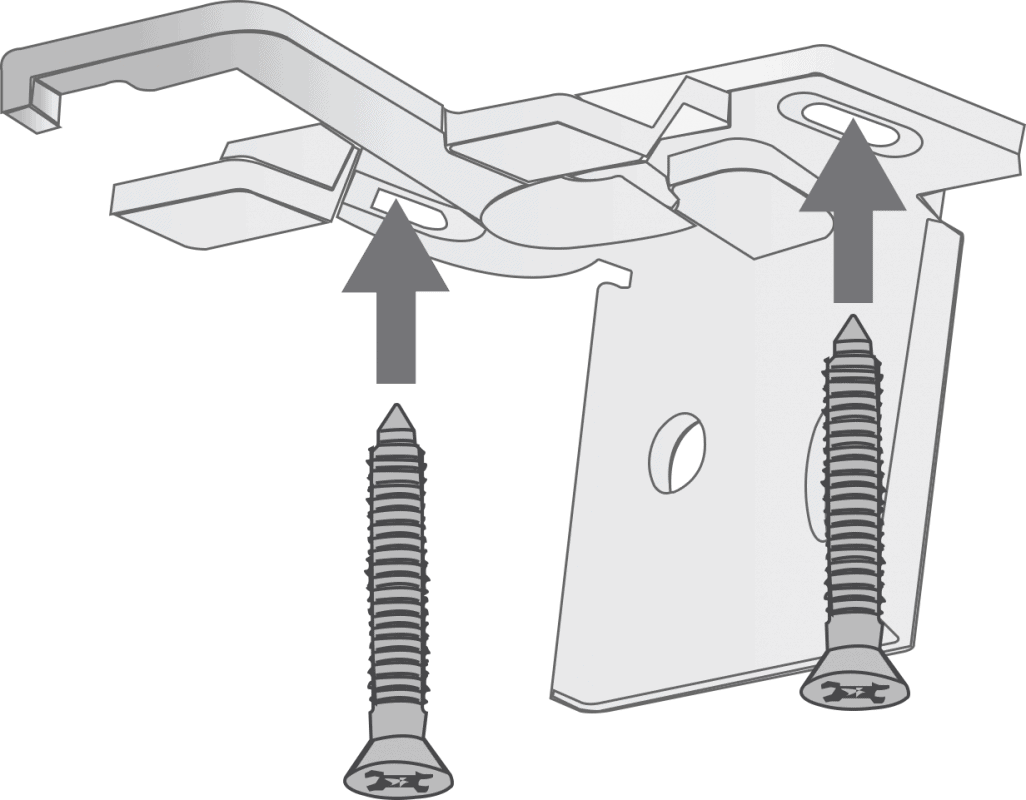
Where the brackets are screwed into the lintel (or ‘ceiling’ of the recess)
Face-Fixing

Where the brackets are screwed onto a facing surface (a wall or window frame)

The outermost brackets should be mounted at least 5cm in from the ends of the blind.

The remainder of the brackets should be spaced evenly along the width of the blind, ensuring that they do not interfere with any of the moving components in the headrail.
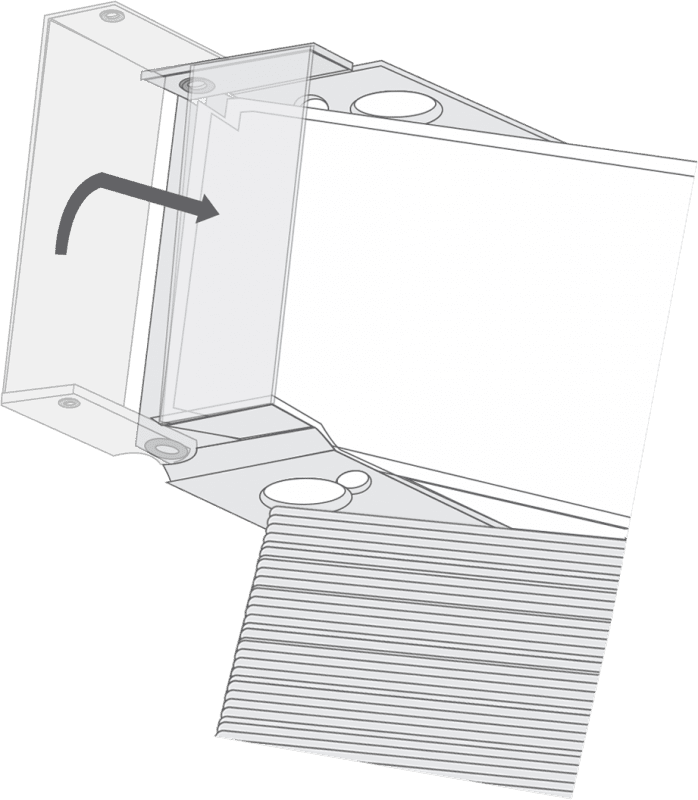
Fitting the blind Step 2
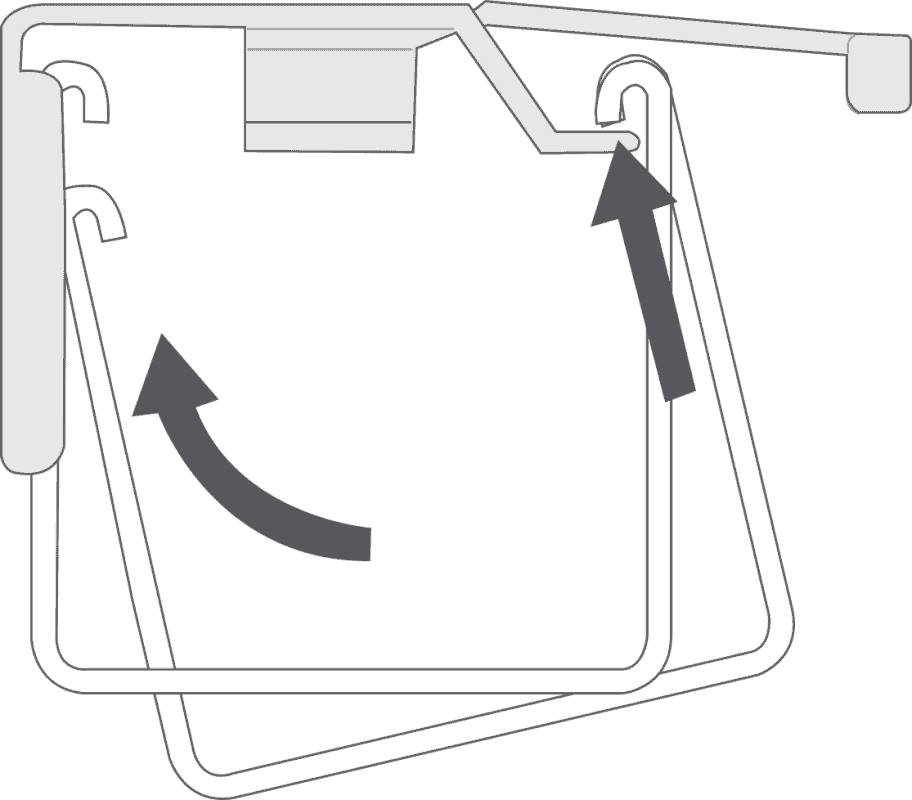
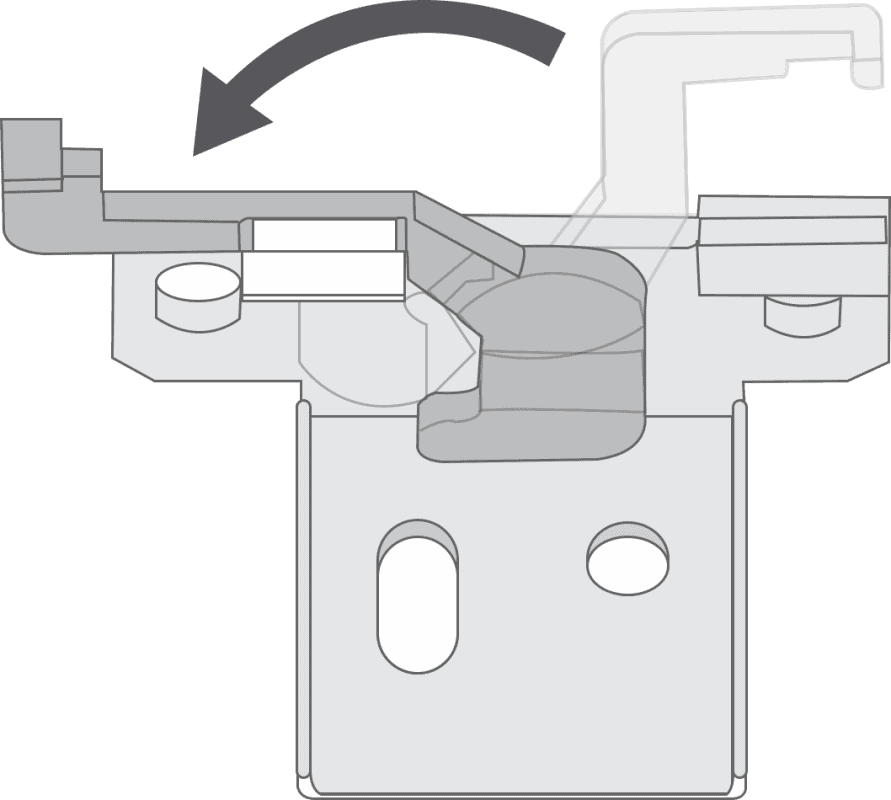
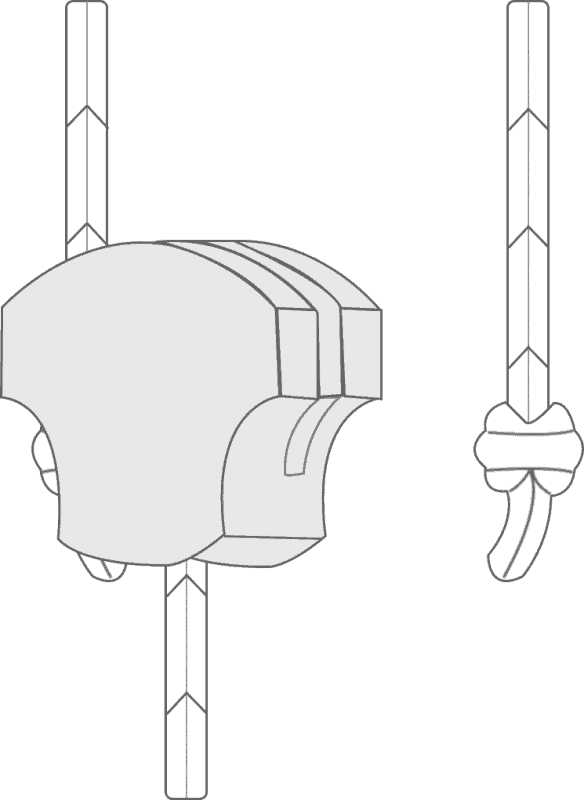
Hook the front lip of the headrail over the protruding hooks at the front of the bracket, then raise the back of the headrail so that it’s level. Holding it in this position, swing the swing-arm over and press it firmly against the headrail to lock it in place.
Child Safety Step 3
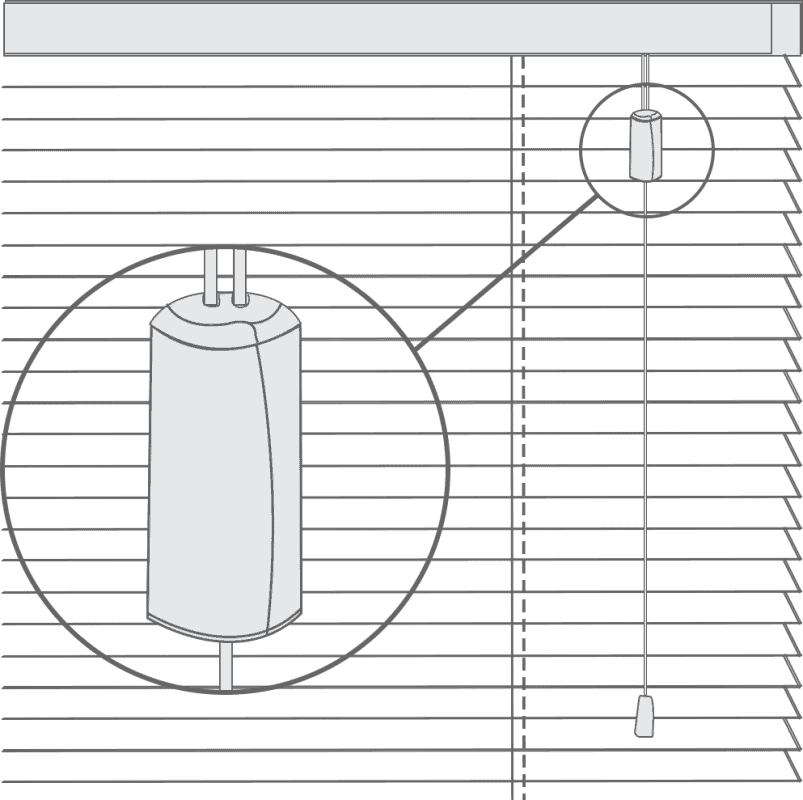
Cord
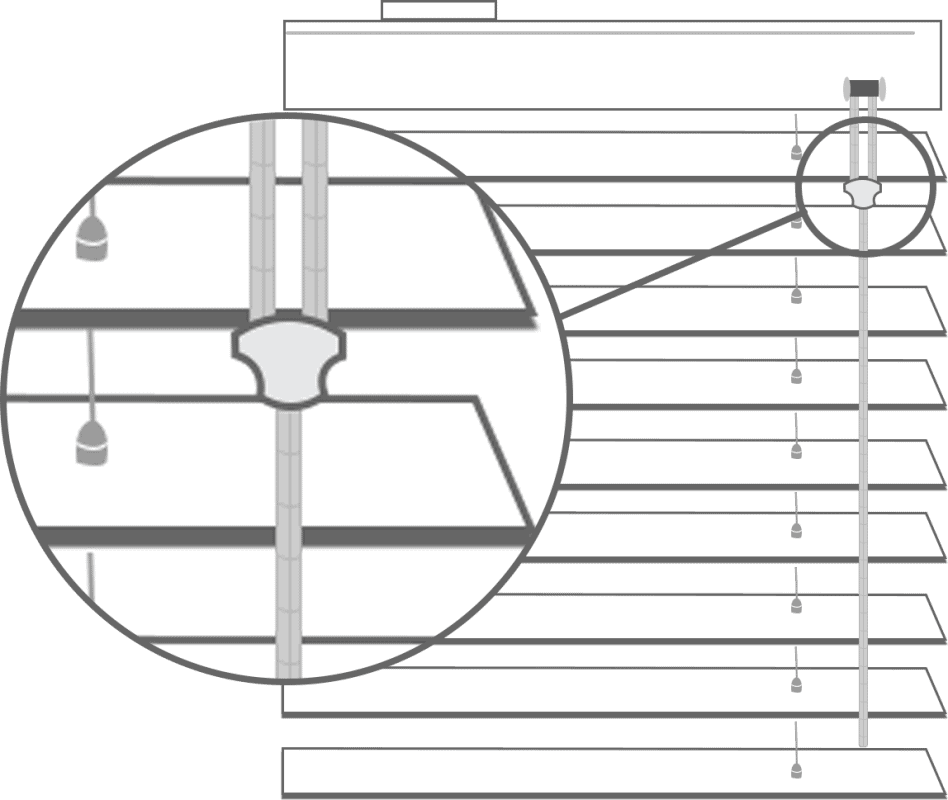
A breakaway cord condenser is pre-fitted to the lift cords so that when a horizontal force is applied to the cords entering the condenser, it safely releases the cords to eliminate any hazardous loops.
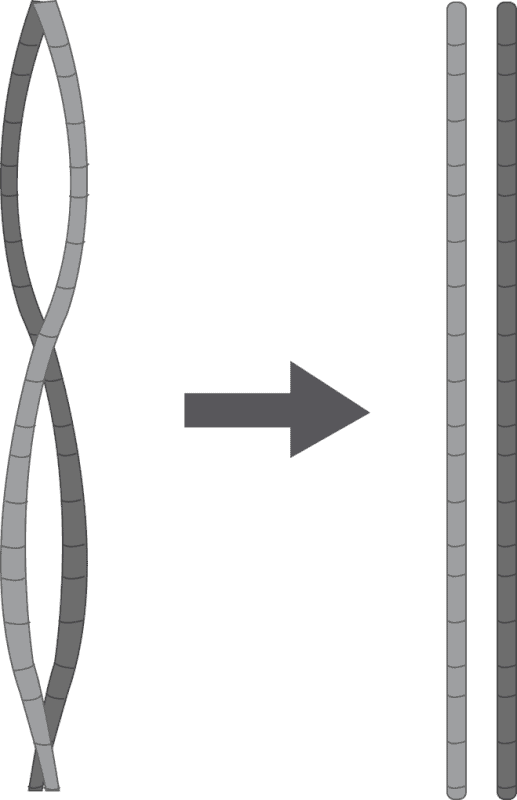
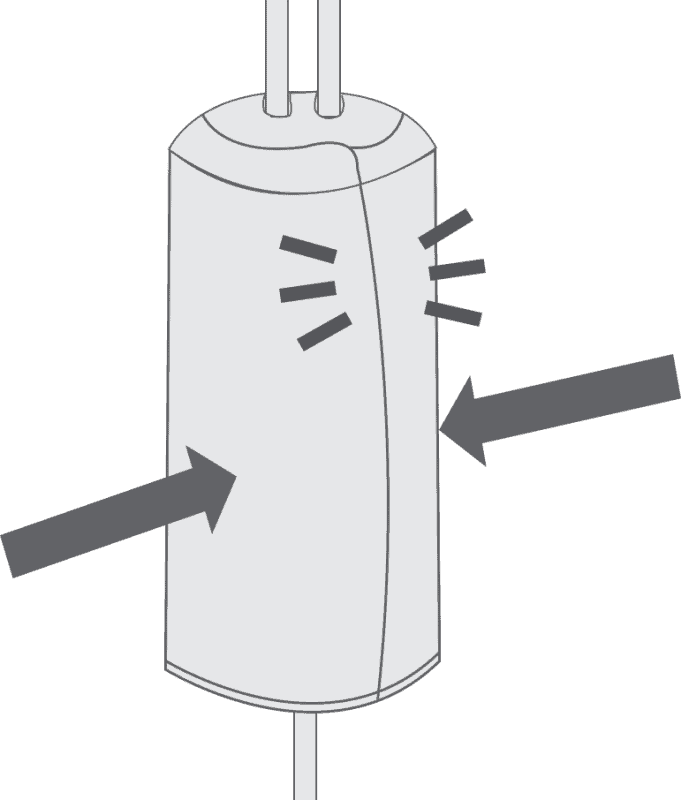
If any of the cords are pulled from the condenser…
Make sure the cords aren’t twisted or tangled
Then slot the cords into the notches on the sides of the condenser, ensuring the knots at the ends of the cords are tight.
Cord Safety Cleat
The safety cleat shall be installed as close to the headrail as possible and in all cases not less than 1500mm from the floor. The cord must be fully accumulated around the safety cleat(s) when the blind is not in use. Use the table below to determine the distance required between the cleats to fully accumulate the cords when the blind is fully raised.
| Drop of blind | *Distance between cord cleats(centre to centre) |
|---|---|
| 1-1000mm | 100mm |
| 1001-2000mm | 150mm |
| 2001-3000mm | 300mm |
Place the safety cleat in the desired position on the wall and mark the positions of the holes with a pencil.

*Distance between cord cleats
(centre to centre)

Mark the hole positions and drill as required. Use the screws provided to attach the safety cleat to the wall.

Wrap the cords around the cord cleats in a figure of 8. When the cords are fully accumulated, ensure they are secure so that when any cord is pulled, no excess cord is released.
Additional Items
Hold Down Brackets
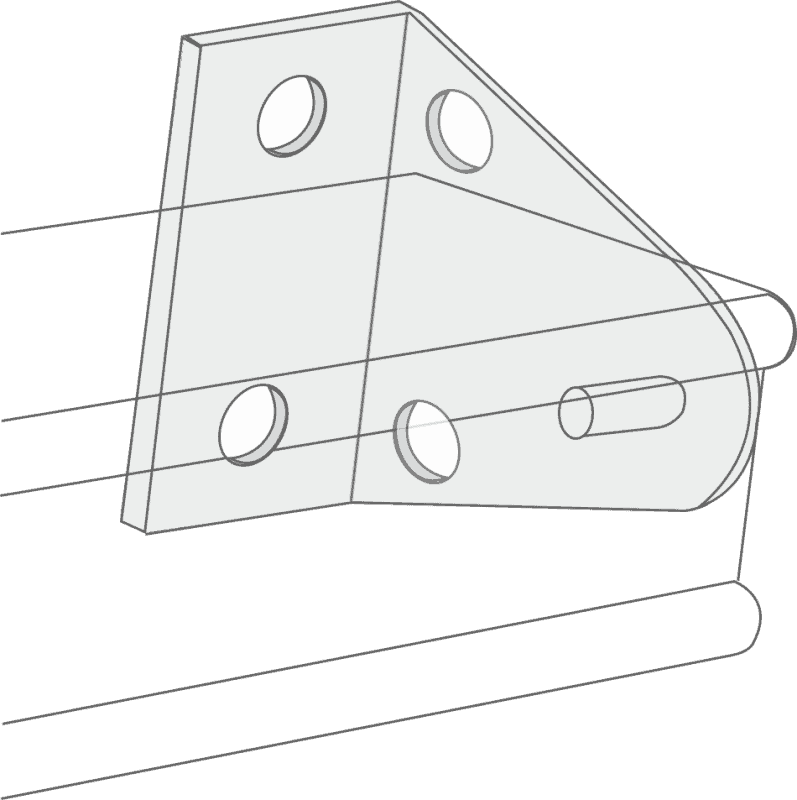
Two triangular, transparent brackets are supplied, which are used to hold the bottom of the blind against the fitting surface. These are only recommended for use when fitting the blind to a door, they are not usually required for window installations.
Installation Guide
Faux Wood / Wooden Venetian Blinds ( 35/50/63mm )
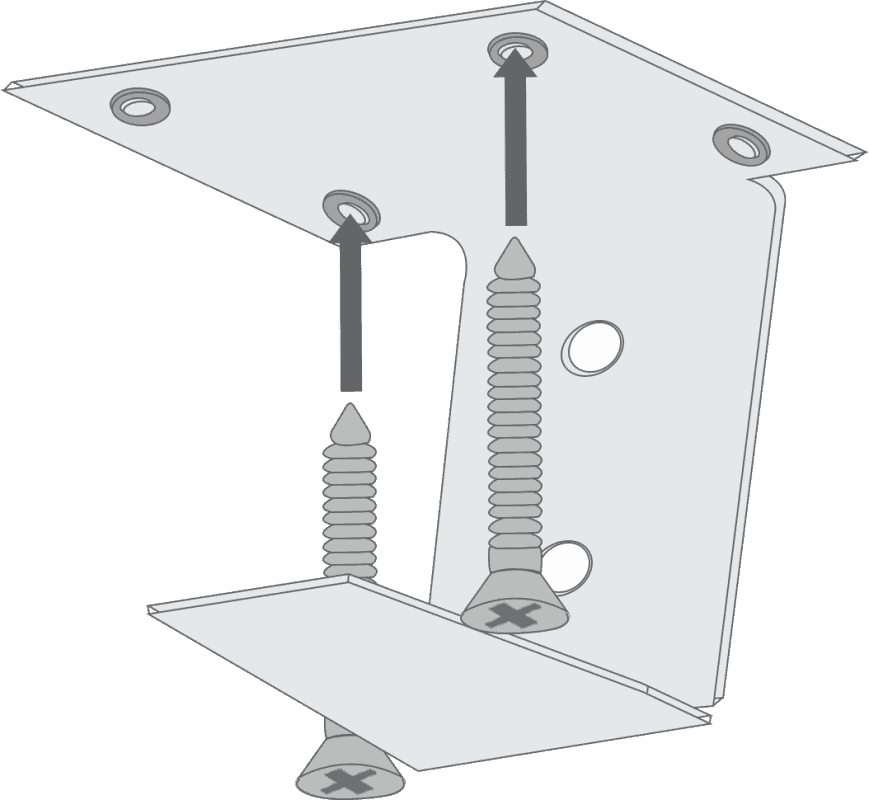
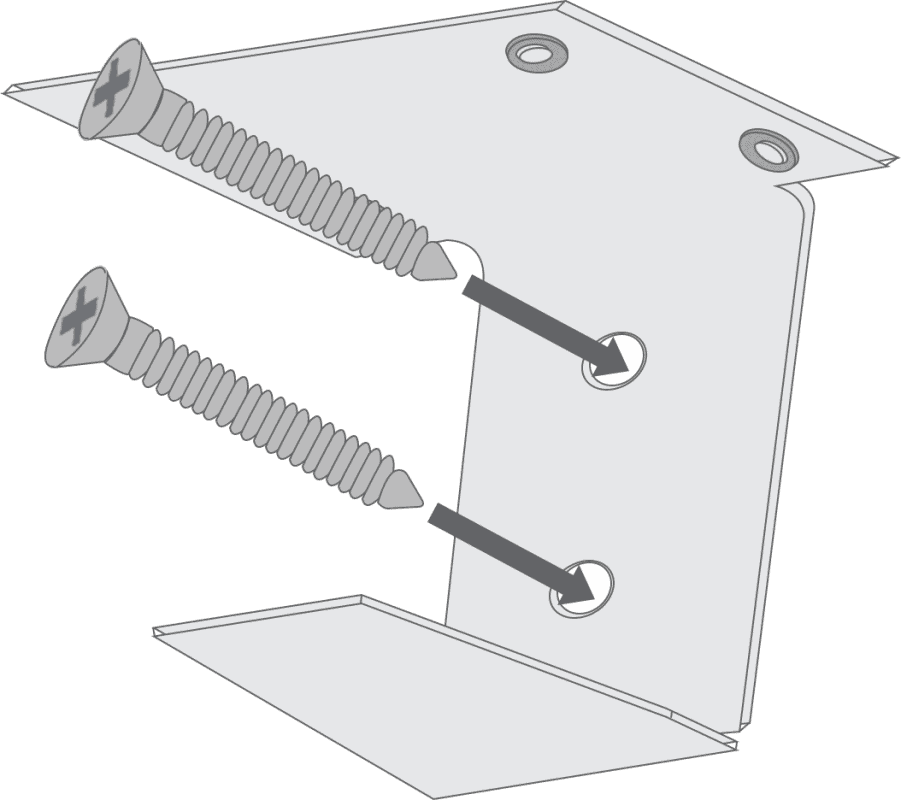
Fitting the brackets Step 1
The brackets offer three methods of installation:

Top-Fixing
Where the brackets are screwed into the lintel (or ‘ceiling’ of the recess)
Side-Fixing
Where the brackets are screwed into the side walls of the recess
Face-Fixing
Where the brackets are screwed onto a facing surface (a wall or window frame)
Top-Fixing
Face-Fixing
Wider blinds will be supplied with support brackets. These should be positioned towards the centre of the window area in-line with the box brackets. Make sure that the position of the support bracket is clear of any cords coming out of the headrail. Support brackets can be top-fixed or face-fixed.
Fitting the blind Step 2
If you are fitting the blind inside a recess, go to step 3 before step 2.
Lift the blind to the window and slot the headrail into the open brackets. Swing the hinged section of the bracket closed and press firmly until it locks.
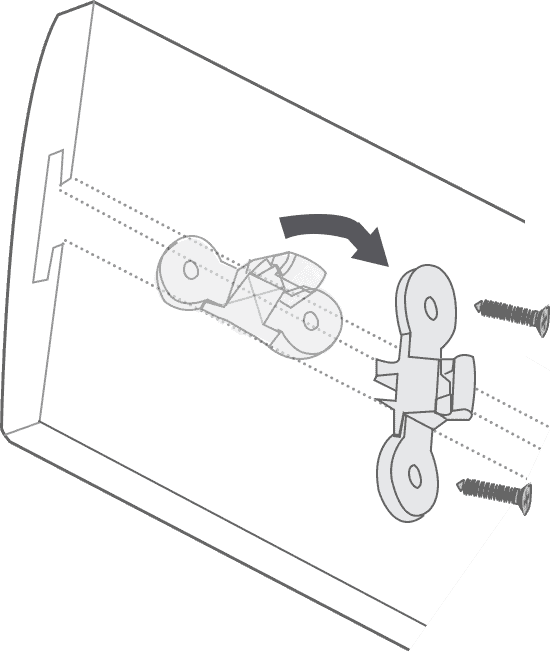
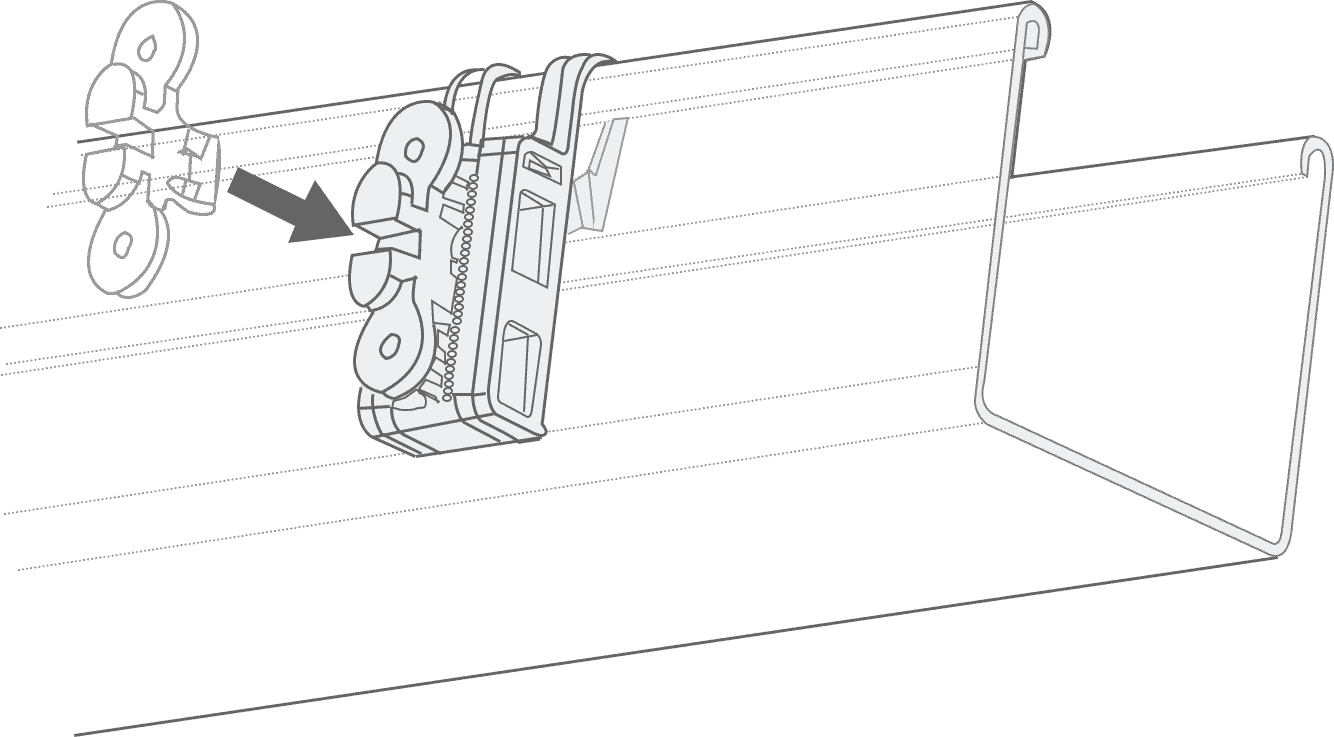
Attach the winged clips to the rear of the pelmet and hook the serrated pelmet clips onto the headrail (if installing the blind within a recess, this should be done before step 2) so that both the serrated clips and winged clips are in corresponding postions on the headrail and pelmet. Then align the two clips with each other and apply gentle pressure to the front of the pelmet, directly over the clips to click them together.
Fitting the pelmet Step 3
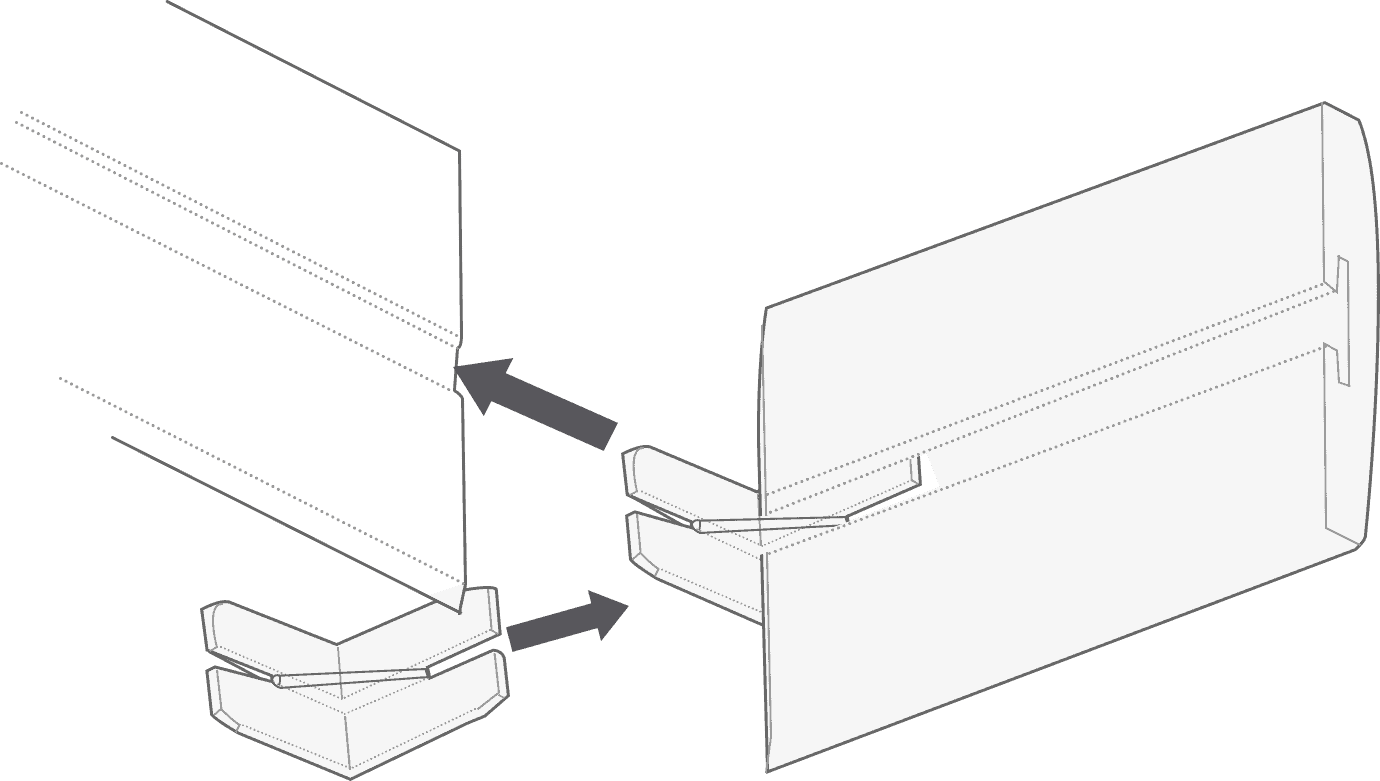
Pelmets for ‘Exact Fitting’
If you’ve ordered ‘exact fitting’ then the pelmet will be sent wider and mitred at the ends, with additional end returns to cover the brackets. Use the ‘L’ shaped plastic brackets from your fittings pack to attach the side returns to the pelmet.
Child Safety Step 4
Cord Condenser
A breakaway cord condenser is pre-fitted to the lift cords so that when a horizontal force is applied to the cords above the condenser, it safely breaks away, eliminating any hazardous loops.
If the cord condenser is pulled apart:
Untwist the cords so that they’re nice and straight.
Slot the cords into the channel in the centre of one half of the consenser. If your condenser differs slightly from the diagram, don’t worry, just slot any cords that aren’t already tied into place inside in the same way.
Click the two halves back together, ensuring there is no loose thread trapped at the edges of the condenser.


Cord Safety Cleat
The safety cleat shall be installed as close to the headrail as possible and in all cases not less than 1500mm from the floor. The cord must be fully accumulated around the safety cleat(s) when the blind is not in use. Use the table below to determine the distance required between the cleats to fully accumulate the cords when the blind is fully raised.
| Drop of blind | *Distance between cord cleats(centre to centre) |
|---|---|
| 1-1000mm | 100mm |
| 1001-2000mm | 150mm |
| 2001-3000mm | 300mm |
Place the safety cleat in the desired position on the wall and mark the positions of the holes with a pencil.

*Distance between cord cleats(centre to centre)

Mark the hole positions and drill as required. Use the screws provided to attach the safety cleat to the wall.

Wrap the cords around the cord cleats in a figure of 8. When the cords are fully accumulated, ensure they are secure so that when any cord is pulled, no excess cord is released.
Perfect Fit Blinds Installation Guide
So what are perfect fit blinds and how do they work?
Perfect fit blinds are an integrated blind that clips to your existing double glazed window frame. That is, providing your windows have an internal trim like the one above (ticked in red). If you just have a rubber seal trim like our bathroom window on the right, it won’t work.
The internal frame section is important as the blinds come with clips that slide behind them, trapping themselves between the trim and the glass itself.
Once they’re in place, the blind frame itself fits to the clips and that is it. No drilling, no screwing and can be easily removed without any damage, leaving no trace behind. And from start to finish, each blind took around 10 minutes to build and fit
How to fit perfect fit blinds
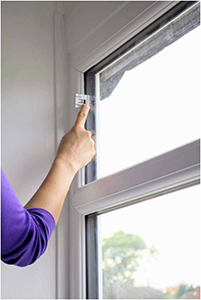
Fitting the clips in to the window frame
Hold the window frame against the window and using a pencil, mark where the oblong slots line up.
The pencil markings are easily wiped off and because the oblong is bigger than the clip, it means you don’t have to be accurate to the mm. There’s some allowance if you’ve got it ever so slightly out.
Slid the clips into the gasket – if you have difficultly lubricate the clips with washing up liquid or hand wash.
Clips frame onto brackets and your all done!!
Any problems please give us a ring where we will be more than happy to help.